<< Prev Question Next Question >>
Question 65/77
Challenge 2
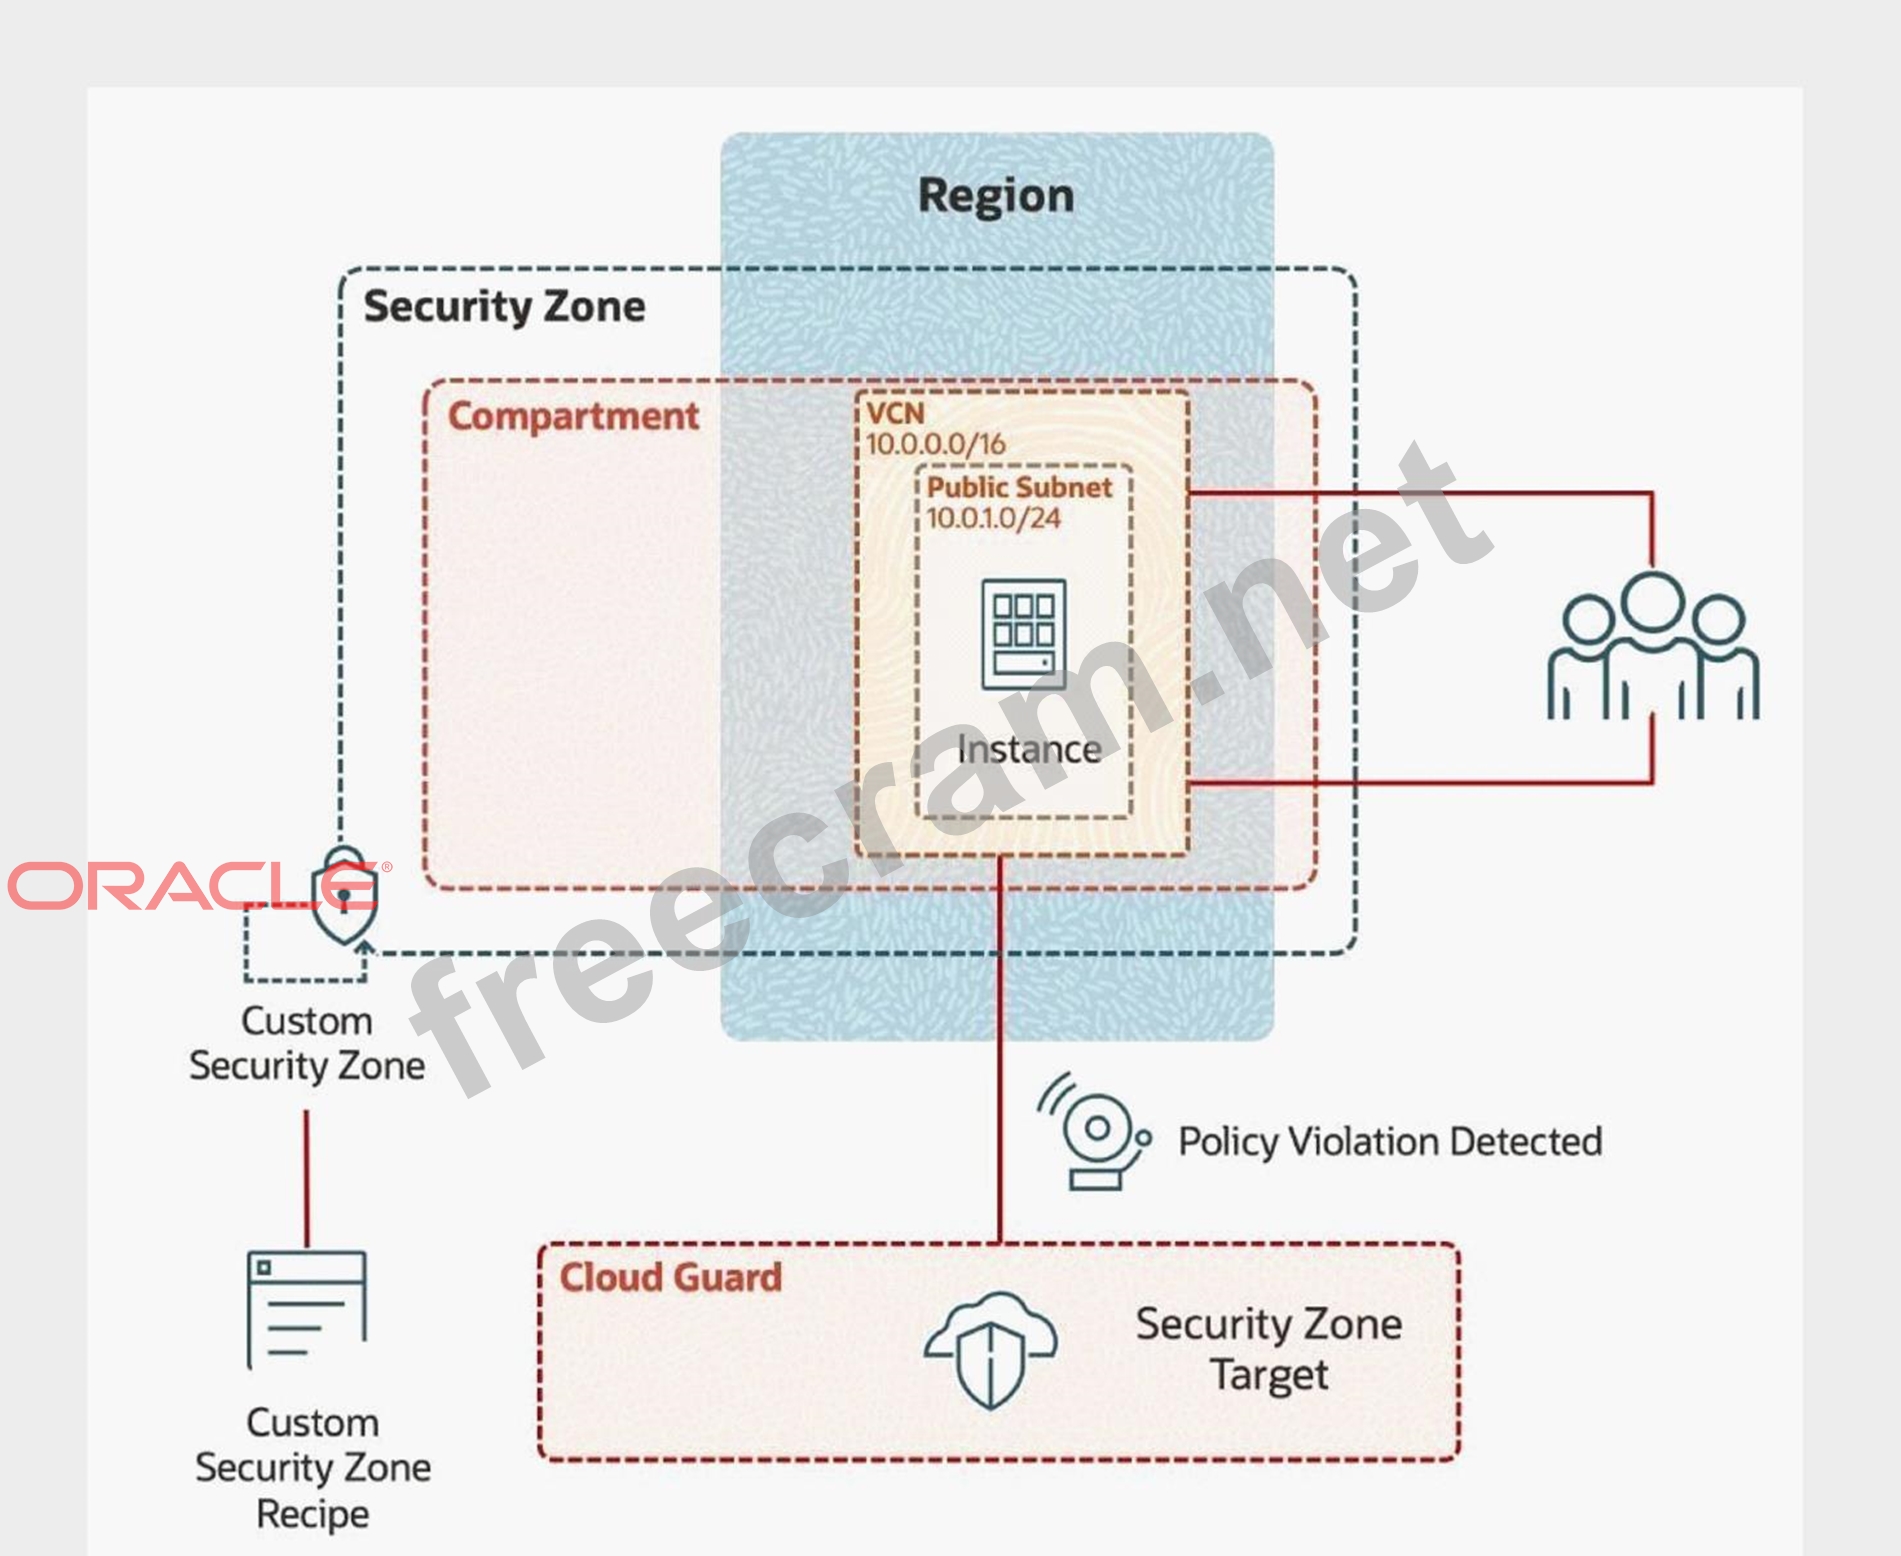
Least-Privileged Model Enforcement Leveraging Custom Security Zones
Scenario
In deploying a new application, a cloud customer needs to reflect different security postures. If a security zone is enabled with the Maximum Security Zone recipe, the customer will be unable to create or update a resource in the Security Zone if the action violates the attached Maximum Security Zone policy.
As an application requirement, the customer requires a compute instance in the public subnet. You, therefore, need to configure Custom Security Zones that allow the creation of compute instances in the public subnet.
To complete this deployment, you have to perform the following tasks in the environment provisioned for you:
* Create a Custom Security Zone recipe to allow compute instances in the public subnet.
* Create a Security Zone using the Custom Security Zone recipe.
* Configure a Virtual Cloud Network (VCN) and Public Subnet.
* Provision a Compute Instance in the public subnet.
Note: You are provided with access to an OCI Tenancy, an assigned compartment, and OCI credentials. Throughout your exam, ensure to use the assigned Compartment 99234021-C01 and Region us-ashburn-1 Complete the following tasks in the provisioned OCI environment:
Create a Custom Recipe with the name
Create a Security Zone with the name
Create a VCN with the name IAD-SP-PBT-VCN-01
Create a Public Subnet with the name IAD-SP-PBT-PUBSNET-01
Create a Compute Instance with the name IAD-SP-PBT-1-VM-01, using the "Oracle Linux 8" image and "VM.Standard2.1" as shape


