SIMULATION
Task 4
You are tasked with creating a logical load balancer for several web servers that were recently deployed.
You need to:


Complete the requested task.
Notes:
Passwords are contained in the user_readme.txt. Do not wait for configuration changes to be applied in this task as processing may take some time to complete. This task should take up to 35 minutes to complete and is required for subsequent tasks.
Correct Answer:
See the Explanation part of the Complete Solution and step by step instructions Explanation:
To create a logical load balancer for several web servers, you need to follow these steps:
Log in to the NSX Manager UI with admin credentials. The default URL is https://<nsx-manager-ip-address>.
Navigate to Networking > Load Balancing > Load Balancers and click Add Load Balancer.
Enter a name and an optional description for the load balancer. Select the tier-1 gateway where you want to attach the load balancer from the drop-down menu or create a new one by clicking New Tier-1 Gateway. Click Save.
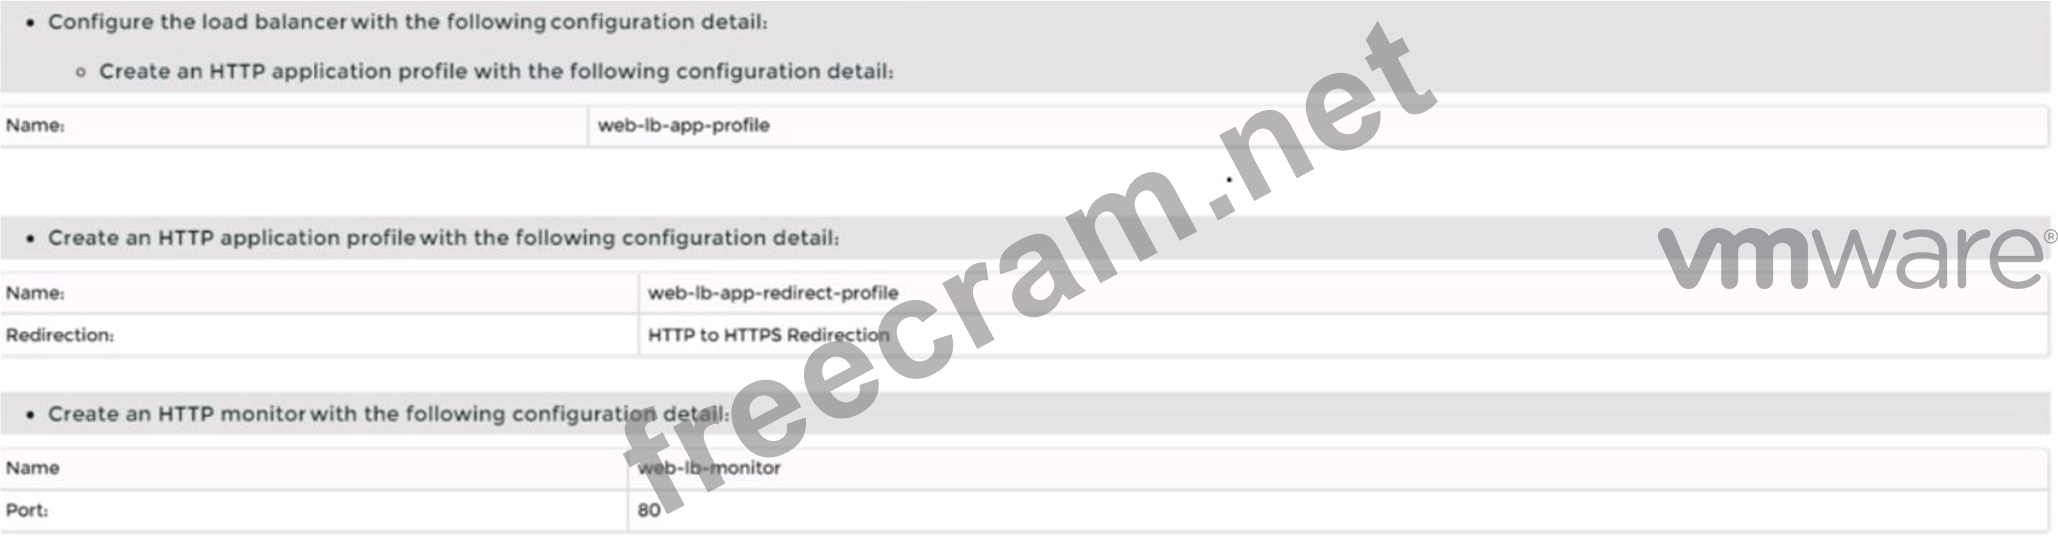
Navigate to Networking > Load Balancing > Application Profiles and click Add Application Profile.
Enter a name and an optional description for the application profile. Select HTTP as the application type from the drop-down menu. Optionally, you can configure advanced settings such as persistence, X-Forwarded-For, SSL offloading, etc., for the application profile. Click Save.
Navigate to Networking > Load Balancing > Monitors and click Add Monitor.
Enter a name and an optional description for the monitor. Select HTTP as the protocol from the drop-down menu. Optionally, you can configure advanced settings such as interval, timeout, fall count, rise count, etc., for the monitor. Click Save.
Navigate to Networking > Load Balancing > Server Pools and click Add Server Pool.
Enter a name and an optional description for the server pool. Select an existing application profile from the drop-down menu or create a new one by clicking New Application Profile. Select an existing monitor from the drop-down menu or create a new one by clicking New Monitor. Optionally, you can configure advanced settings such as algorithm, SNAT translation mode, TCP multiplexing, etc., for the server pool. Click Save.
Click Members > Set > Add Member and enter the IP address and port number of each web server that you want to add to the server pool. For example, enter 192.168.10.10:80 and 192.168.10.11:80 for two web servers listening on port 80. Click Save and then Close.
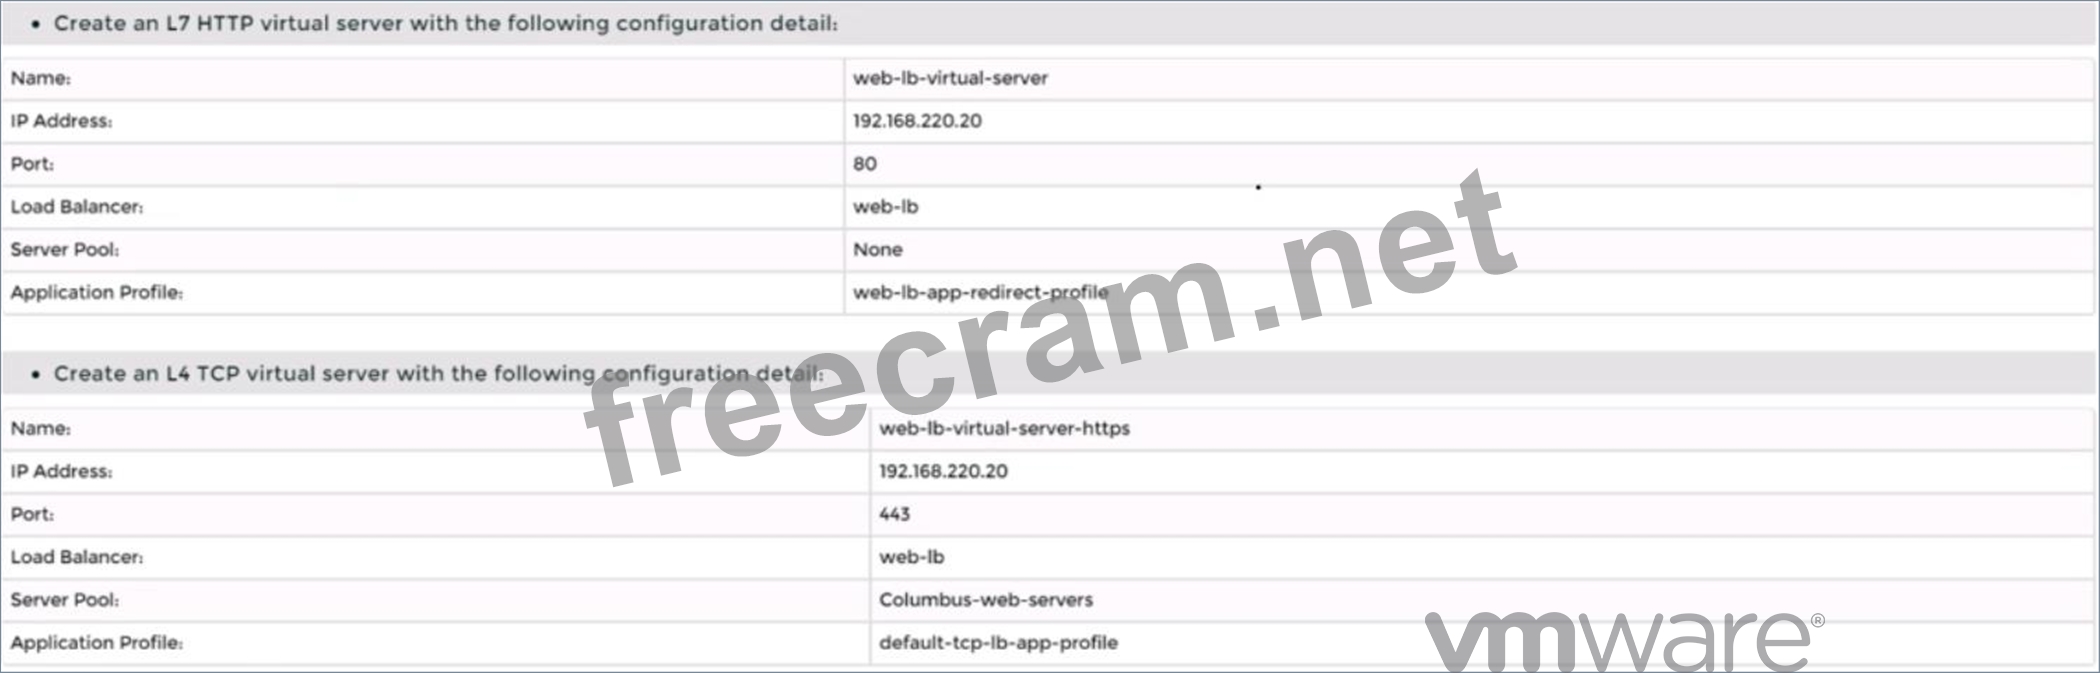
Navigate to Networking > Load Balancing > Virtual Servers and click Add Virtual Server.
Enter a name and an optional description for the virtual server. Enter the IP address and port number of the virtual server that will receive the client requests, such as 10.10.10.100:80. Select HTTP as the service profile from the drop-down menu or create a new one by clicking New Service Profile. Select an existing server pool from the drop-down menu or create a new one by clicking New Server Pool. Optionally, you can configure advanced settings such as access log, connection limit, rate limit, etc., for the virtual server. Click Save.
You have successfully created a logical load balancer for several web servers using NSX-T Manager UI.


