Valid AZ-500 Dumps shared by ExamDiscuss.com for Helping Passing AZ-500 Exam! ExamDiscuss.com now offer the newest AZ-500 exam dumps, the ExamDiscuss.com AZ-500 exam questions have been updated and answers have been corrected get the newest ExamDiscuss.com AZ-500 dumps with Test Engine here:
Access AZ-500 Dumps Premium Version
(497 Q&As Dumps, 35%OFF Special Discount Code: freecram)
<< Prev Question Next Question >>
Question 83/156
You need to create a new Azure Active Directory (Azure AD) directory named 10317806.onmicrosoft.com.
The new directory must contain a user named user10317806 who is configured to sign in by using Azure Multi-Factor Authentication (MFA).
The new directory must contain a user named user10317806 who is configured to sign in by using Azure Multi-Factor Authentication (MFA).
Correct Answer:
See the explanation below.
Explanation
To create a new Azure AD tenant:
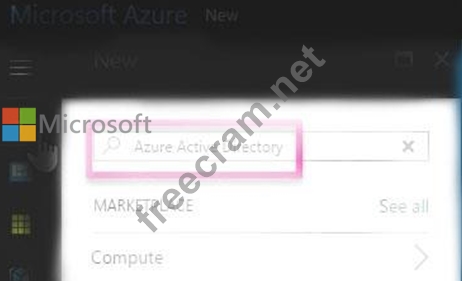
1. Browse to the Azure portal and sign in with an account that has an Azure subscription.
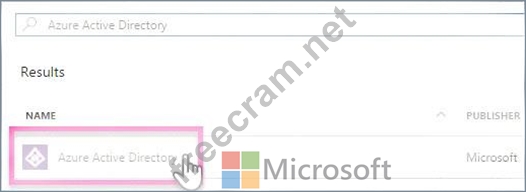
2. Select the plus icon (+) and search for Azure Active Directory.
3. Select Azure Active Directory
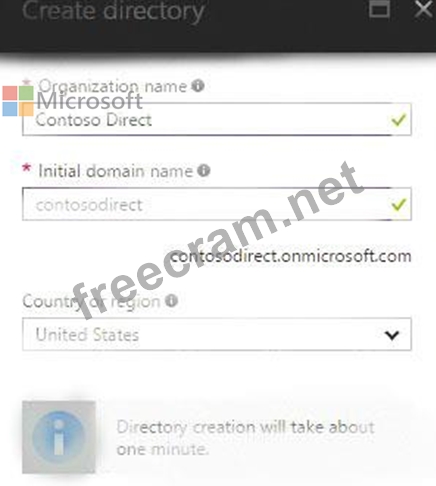
4. Select Create.
5. Provide an Organization name (10317806) and an Initial domain name (10317806). Then select Create.
This will create the directory named
10317806.onmicrosoft.com.
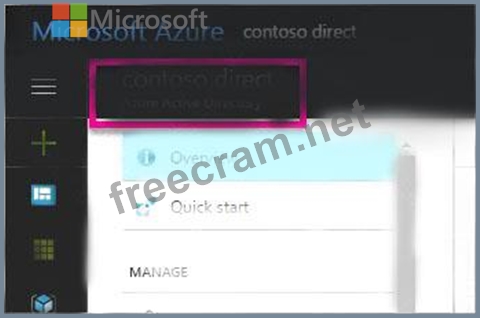
6. After directory creation is complete, select the information box to manage your new directory.
To create the user:
1. In the Azure portal, make sure you are on the Azure Active Directory fly out.
If not, select the Azure Active Directory icon from the left services navigation.

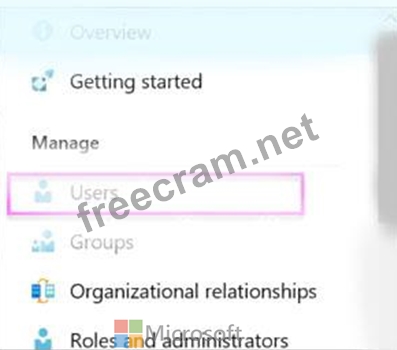
2. Under Manage, select Users.
3. Select All users and then select
4. Provide a Name and User name (user10317806) for the user. When you're done, select Create.
To enable MFA:
1. In the Azure portal, make sure you are on the Azure Active Directory fly out.
If not, select the Azure Active Directory icon from the left services navigation.
2. Under Manage, select Users.
3. Click on the Multi-Factor Authentication
4. Tick the checkbox next to the user's name and click the
Reference:
https://docs.microsoft.com/en-us/power-bi/developer/create-an-azure-active-directory-tenant
Explanation
To create a new Azure AD tenant:
1. Browse to the Azure portal and sign in with an account that has an Azure subscription.
2. Select the plus icon (+) and search for Azure Active Directory.
3. Select Azure Active Directory
4. Select Create.
5. Provide an Organization name (10317806) and an Initial domain name (10317806). Then select Create.
This will create the directory named
10317806.onmicrosoft.com.
6. After directory creation is complete, select the information box to manage your new directory.
To create the user:
1. In the Azure portal, make sure you are on the Azure Active Directory fly out.
If not, select the Azure Active Directory icon from the left services navigation.
2. Under Manage, select Users.
3. Select All users and then select
4. Provide a Name and User name (user10317806) for the user. When you're done, select Create.
To enable MFA:
1. In the Azure portal, make sure you are on the Azure Active Directory fly out.
If not, select the Azure Active Directory icon from the left services navigation.
2. Under Manage, select Users.
3. Click on the Multi-Factor Authentication
4. Tick the checkbox next to the user's name and click the
Reference:
https://docs.microsoft.com/en-us/power-bi/developer/create-an-azure-active-directory-tenant


- Question List (156q)
- Question 1: You have an Azure web app named WebApp1. https://www.fast2te...
- Question 2: You create a new Azure subscription that is associated to a ...
- Question 3: You create an Azure subscription. You need to ensure that yo...
- Question 4: You create an Azure subscription. You need to ensure that yo...
- Question 5: You network contains an on-premises Active Directory domain ...
- Question 6: You have an Azure Active Directory (Azure AD) tenant that co...
- Question 7: Use the following login credentials as needed: To enter your...
- Question 8: Use the following login credentials as needed: To enter your...
- Question 9: You suspect that users are attempting to sign in to resource...
- Question 10: You have two Azure virtual machines in the East US2 region a...
- Question 11: Use the following login credentials as needed: To enter your...
- Question 12: You need to ensure that User2 can implement PIM. What should...
- Question 13: Note: This question is part of a series of questions that pr...
- Question 14: You need to create Role1 to meet the platform protection req...
- Question 15: You have an Azure Active Directory (Azure AD) tenant. You ha...
- Question 16: You create a new Azure subscription that is associated to a ...
- Question 17: You have an Azure subscription that contains the resources s...
- Question 18: You need to ensure that you can meet the security operations...
- Question 19: You have an Azure Active Directory (Azure AD) tenant named c...
- Question 20: From the Azure portal, you are configuring an Azure policy. ...
- Question 21: Note: This question is part of a series of questions that pr...
- Question 22: You have an Azure Active Directory (Azure AD) tenant named c...
- Question 23: You have an Azure Active Directory (Azure AD) tenant named c...
- Question 24: You are evaluating the effect of the application security gr...
- Question 25: You have an Azure Active Directory (Azure AD) tenant named c...
- Question 26: Note: This question is part of a series of questions that pr...
- Question 27: You have an Azure subscription that contains the virtual mac...
- Question 28: Use the following login credentials as needed: To enter your...
- Question 29: You have Azure Resource Manager templates that you use to de...
- Question 30: You are evaluating the effect of the application security gr...
- Question 31: : 2 HOTSPOT Which virtual networks in Sub1 can User2 modify ...
- Question 32: You have an Azure subscription named Sub1 that is associated...
- Question 33: You have an Azure subscription that contains the virtual net...
- Question 34: You have an Azure key vault. You need to delegate administra...
- Question 35: You have an Azure Storage account named storage1 that has a ...
- Question 36: You are implementing conditional access policies. You must e...
- Question 37: You need to deploy Microsoft Antimalware to meet the platfor...
- Question 38: You have Azure virtual machines that have Update Management ...
- Question 39: You plan to use Azure Log Analytics to collect logs from 200...
- Question 40: You have 15 Azure virtual machines in a resource group named...
- Question 41: You have an Azure subscription that contains the following r...
- Question 42: DRAG DROP You have an Azure subscription named Sub1 that con...
- Question 43: Your company has an Azure subscription named Subscription1 t...
- Question 44: You need to ensure that you can meet the security operations...
- Question 45: The developers at your company plan to publish an app named ...
- Question 46: You have an Azure subscription that contains an Azure key va...
- Question 47: DRAG DROP You have an Azure subscription that contains 100 v...
- Question 48: You are troubleshooting a security issue for an Azure Storag...
- Question 49: You need to ensure that the Azure AD application registratio...
- Question 50: You are configuring just in time (JIT) VM access to a set of...
- Question 51: You have an Azure subscription that contains the following r...
- Question 52: Note: This question is part of a series of questions that pr...
- Question 53: You create a new Azure subscription. You need to ensure that...
- Question 54: You have an Azure subscription that contains an Azure key va...
- Question 55: You have an Azure subscription named Sub1 that contains an A...
- Question 56: You need to configure a virtual network named VNET2 to meet ...
- Question 57: You have an Azure subscription named Sub1 that contains the ...
- Question 58: Your network contains an Active Directory forest named conto...
- Question 59: You have an Azure subscription that contains the alerts show...
- Question 60: Use the following login credentials as needed: To enter your...
- Question 61: Your company has two offices in Seattle and New York. Each o...
- Question 62: You have an Azure subscription that contains a user named Ad...
- Question 63: You create an Azure subscription with Azure AD Premium P2. Y...
- Question 64: You have an Azure subscription named Sub1 that contains the ...
- Question 65: You need to meet the identity and access requirements for Gr...
- Question 66: You need to configure an access review. The review will be a...
- Question 67: Note: This question is part of a series of questions that pr...
- Question 68: You have an Azure subscription that contains the resources s...
- Question 69: You work at a company named Contoso, Ltd. that has the offic...
- Question 70: Note: This question is part of a series of questions that pr...
- Question 71: You have an Azure subscription that contains the resources s...
- Question 72: You need to create Role1 to meet the platform protection req...
- Question 73: You have two Azure virtual machines in the East US2 region a...
- Question 74: You are evaluating the effect of the application security gr...
- Question 75: You have an Azure subscription that contains the virtual mac...
- Question 76: Your network contains an Active Directory forest named conto...
- Question 77: You have three on-premises servers named Server1, Server2, a...
- Question 78: You have an Azure subscription linked to an Azure Active Dir...
- Question 79: Your company has two offices in Seattle and New York. Each o...
- Question 80: You have two Azure virtual machines in the East US2 region a...
- Question 81: Your company has an Azure Active Directory (Azure AD) tenant...
- Question 82: You have an Azure subscription named Subcription1 that conta...
- Question 83: You need to create a new Azure Active Directory (Azure AD) d...
- Question 84: You have an Azure subscription named Subcription1 that conta...
- Question 85: You need to prevent administrators from performing accidenta...
- Question 86: You have the Azure virtual machines shown in the following t...
- Question 87: You are evaluating the security of the network communication...
- Question 88: You need to meet the technical requirements for VNetwork1. W...
- Question 89: You need to deploy AKS1 to meet the platform protection requ...
- Question 90: You have an Azure subscription named Sub1 that contains the ...
- Question 91: You have an Azure Active Directory (Azure AD) tenant that co...
- Question 92: You have an Azure subscription. The subscription contains Az...
- Question 93: You have an Azure subscription that contains a virtual machi...
- Question 94: Your company has two offices in Seattle and New York. Each o...
- Question 95: You need to ensure that User2 can implement PIM. What should...
- Question 96: You have an Azure subscription that contains an Azure Sentin...
- Question 97: Note: This question is part of a series of questions that pr...
- Question 98: You are implementing conditional access policies. You must e...
- Question 99: You have the Azure Information Protection conditions shown i...
- Question 100: You have an Azure subscription that contains the virtual mac...
- Question 101: Which virtual networks in Sub1 can User2 modify and delete i...
- Question 102: You create an Azure subscription with Azure AD Premium P2. Y...
- Question 103: You have an Azure subscription. You need to create and deplo...
- Question 104: You have an Azure key vault. You need to delegate administra...
- Question 105: You assign User8 the Owner role for RG4, RG5, and RG6. In wh...
- Question 106: You need to deploy Microsoft Antimalware to meet the platfor...
- Question 107: Your network contains an on-premises Active Directory domain...
- Question 108: You have a network security group (NSG) bound to an Azure su...
- Question 109: You need to ensure that users can access VM0. The solution m...
- Question 110: You have an Azure subscription that contains a user named Ad...
- Question 111: You have an Azure subscription that contains 100 virtual mac...
- Question 112: You have an Azure Container Registry named Registry1. You ad...
- Question 113: You have an Azure subscription. The subscription contains Az...
- Question 114: You have an Azure subscription that contains the resources s...
- Question 115: You create an alert rule that has the following settings: Re...
- Question 116: Your company has an Azure Active Directory (Azure AD) tenant...
- Question 117: You have an Azure subscription named Subcription1 that conta...
- Question 118: Note: This question is part of a series of questions that pr...
- Question 119: Use the following login credentials as needed: To enter your...
- Question 120: You have a hybrid configuration of Azure Active Directory (A...
- Question 121: You have an Azure subscription named Subcription1 that conta...
- Question 122: Note: This question is part of a series of questions that pr...
- Question 123: You have an Azure subscription that contains three storage a...
- Question 124: Note: This question is part of a series of questions that pr...
- Question 125: You have an Azure subscription that contains a resource grou...
- Question 126: You create a new Azure subscription that is associated to a ...
- Question 127: You create an Azure subscription with Azure AD Premium P2. Y...
- Question 128: Your company has an Azure Active Directory (Azure AD) tenant...
- Question 129: You have an Azure subscription that contains the virtual net...
- Question 130: Use the following login credentials as needed: To enter your...
- Question 131: What is the membership of Group1 and Group2? To answer, sele...
- Question 132: You have an Azure subscription that contains the resources s...
- Question 133: You have the Azure key vaults shown in the following table. ...
- Question 134: You have an Azure subscription that contains the alerts show...
- 1 commentQuestion 135: You have an Azure subscription that contains the virtual mac...
- Question 136: You have an Azure subscription named Subscription1 that cont...
- Question 137: You need to ensure that a user named Danny11597200 can sign ...
- Question 138: You have an Azure SQL Database server named SQL1. You turn o...
- Question 139: You have an Azure Container Registry named ContReg1 that con...
- Question 140: You have an Azure subscription named Sub1 that contains an A...
- Question 141: You need to configure support for Azure Sentinel notebooks t...
- Question 142: Use the following login credentials as needed: To enter your...
- Question 143: You assign User8 the Owner role for RG4, RG5, and RG6. In wh...
- Question 144: You have an Azure subscription named Sub1 that is associated...
- Question 145: You have 20 Azure subscriptions and a security group named G...
- Question 146: You need to create an Azure key vault. The solution must ens...
- Question 147: You have an Azure subscription named Sub1 that contains the ...
- Question 148: Your company has an Azure Active Directory (Azure AD) tenant...
- Question 149: : 2 HOTSPOT Which virtual networks in Sub1 can User2 modify ...
- Question 150: You company has an Azure Active Directory (Azure AD) tenant ...
- Question 151: Note: This question is part of a series of questions that pr...
- Question 152: You have an Azure subscription. The subscription contains Az...
- Question 153: You have an Azure subscription that contains 100 virtual mac...
- Question 154: Your network contains an on-premises Active Directory domain...
- Question 155: From Azure Security Center, you need to deploy SecPol1. What...
- Question 156: You have an Azure Active Directory (Azure AD) tenant named c...
